Seven Layer Taco Dip
I discovered the magic of this recipe during my first football party hosting experience when I needed something impressive but foolproof that wouldn’t keep me away from my guests. After watching the entire dip disappear in record time and fielding countless recipe requests, it became my signature party contribution that friends and family now specifically request for every gathering, proving that sometimes the simplest recipes create the most lasting memories.
Quality Ingredient Selection
- Refried beans: Choose varieties with minimal additives for the smoothest texture and richest flavor that spreads easily
- Taco seasoning: Use your favorite blend or low-sodium versions to control saltiness while delivering authentic Tex-Mex taste
- Full-fat sour cream: Provides the richest, most stable layer that won’t separate or become watery during chilling
- Chunky salsa: Select medium heat levels with visible vegetable pieces for optimal texture and balanced spice
- Sharp cheddar cheese: Freshly shredded cheese melts better and provides more intense flavor than pre-shredded varieties
- Fresh tomatoes: Use ripe tomatoes diced uniformly, or drain canned varieties thoroughly to prevent soggy layers
- Quality black olives: Choose canned olives with firm texture, avoiding mushy varieties that could break apart
- Fresh green onions: Select bright, firm stalks with crisp white bulbs for the best crunch and sharpest flavor
- Crisp lettuce: Use iceberg or romaine varieties, washing and drying thoroughly to prevent excess moisture
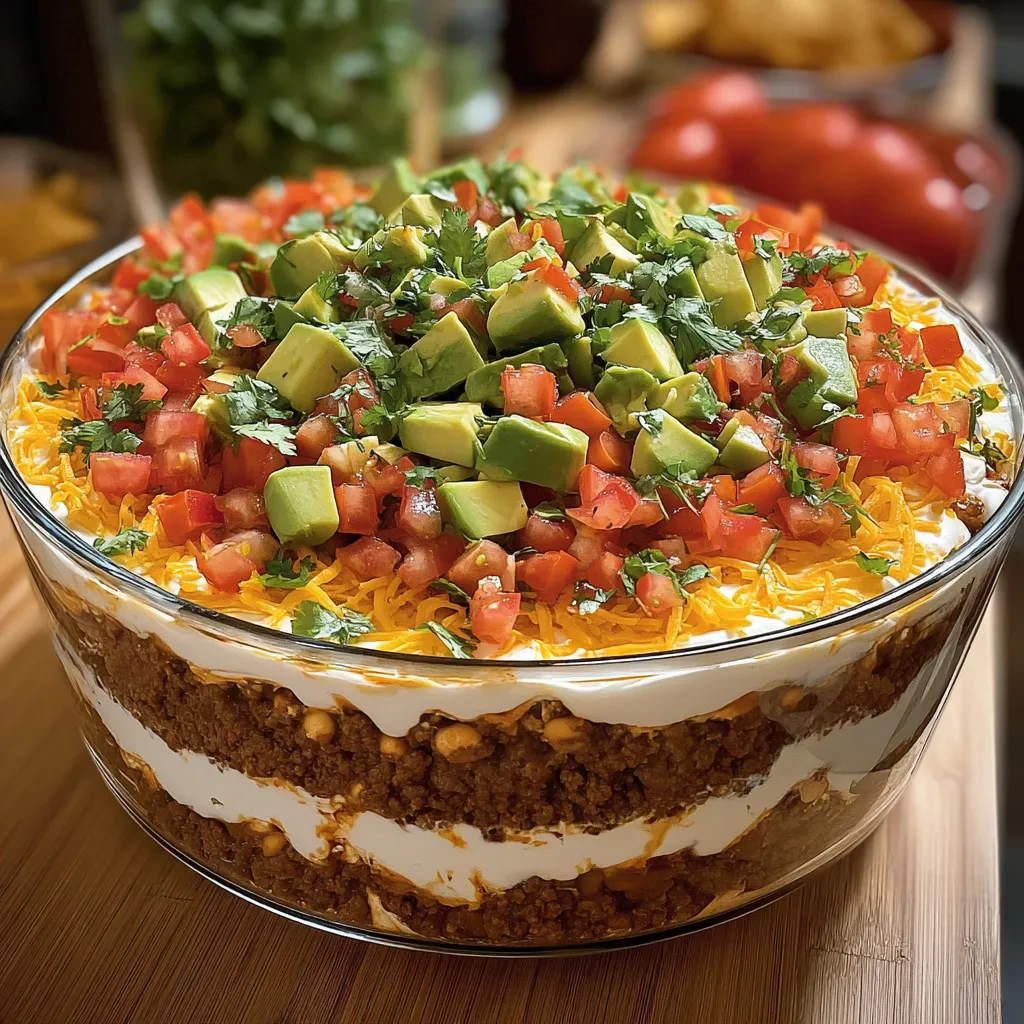
Layer-by-Layer Assembly
- Foundation Layer Creation
- Combine the refried beans with taco seasoning in a medium bowl, stirring thoroughly until the mixture appears uniform and well-blended with no dry seasoning pockets visible. Spread this seasoned bean mixture evenly across the bottom of your serving dish using a spatula, ensuring complete coverage to the edges for a stable foundation that supports all the subsequent layers.
- Creamy Second Layer
- Carefully spread the sour cream over the seasoned bean layer using the back of a large spoon, working gently to maintain distinct separation between layers while achieving even coverage. This creamy layer provides cooling contrast to the seasoned beans while creating a neutral backdrop for the more vibrant layers above.
- Salsa Distribution
- Spoon the chunky salsa evenly over the sour cream layer, using light pressure to distribute without mixing the layers together, which maintains the beautiful visual distinction that makes this dip so appealing. The salsa adds moisture, acidity, and vegetable texture that bridges the creamy and cheese layers perfectly.
- Cheese Coverage
- Sprinkle the shredded sharp cheddar cheese generously and evenly across the salsa layer, ensuring complete coverage that will provide richness and saltiness in every scoop. The cheese layer also helps bind the fresher ingredients above while adding visual appeal with its golden color.
- Fresh Vegetable Layers
- Distribute the diced tomatoes evenly over the cheese, followed by a layer of shredded lettuce that provides essential crunch and freshness to balance the richer layers below. These fresh components add vital textural contrast and bright flavors that prevent the dip from feeling too heavy or rich.
- Final Garnish
- Top with sliced black olives and chopped green onions, arranging them attractively across the surface to create visual appeal while providing the final flavor notes of brine and sharp onion that complete the classic taco flavor profile.
- Essential Chilling
- Cover the completed dip and refrigerate for at least one hour, allowing the flavors to meld together while the layers firm up for optimal scooping consistency and flavor development.
The genius of this dip lies in how each layer contributes distinct flavors and textures that work together harmoniously, creating a complete flavor experience that mimics all the best elements of a perfectly constructed taco in shareable dip form. The chilling process allows the flavors to marry while maintaining the structural integrity that makes each scoop a perfect representation of all seven layers.
Perfect Serving Ideas
Present this colorful dip in a clear glass dish that showcases the beautiful layers, surrounded by an abundance of sturdy tortilla chips that can handle the substantial scooping required. For lighter options, offer fresh vegetable sticks like bell pepper strips, carrot sticks, or cucumber slices that provide healthy alternatives. Individual serving cups work beautifully for buffet-style entertaining, making portion control easier while maintaining the impressive layered presentation.
Creative Recipe Variations
Transform this classic by substituting Greek yogurt for sour cream to increase protein content while maintaining creamy texture. Mexican cheese blends or Monterey Jack provide milder alternatives to sharp cheddar, while black beans mashed with olive oil create a healthier alternative to traditional refried beans. For heat lovers, add diced jalapeños or spicy pickled onions, while seasonal variations might include corn kernels in summer or roasted peppers in fall.
Smart Storage Solutions
Store leftovers covered in the refrigerator for up to two days, though the dip is definitely best within the first day when vegetables maintain optimal crispness. For make-ahead preparation, assemble all layers except lettuce and tomatoes up to twenty-four hours in advance, adding the fresh components just before serving to preserve texture and prevent sogginess. Always serve chilled directly from the refrigerator to maintain proper consistency and food safety.
Professional Assembly Tips
- Press the refried bean layer firmly to create a stable foundation that won’t shift when other layers are added
- Dry all fresh vegetables thoroughly to prevent excess moisture from making the dip watery or causing layers to blend
- Serve in a bowl nestled over ice for extended parties to maintain food safety and optimal texture throughout the event